Installing the Client on Windows
This page walks through downloading and installing the iShareRadio client on a Windows PC. When you are done, return to Install the Client Software to pair the client with your account.
If you already have an earlier version of the client installed, you do not need to uninstall it first. The installer cleans up the old version and installs the new one.
-
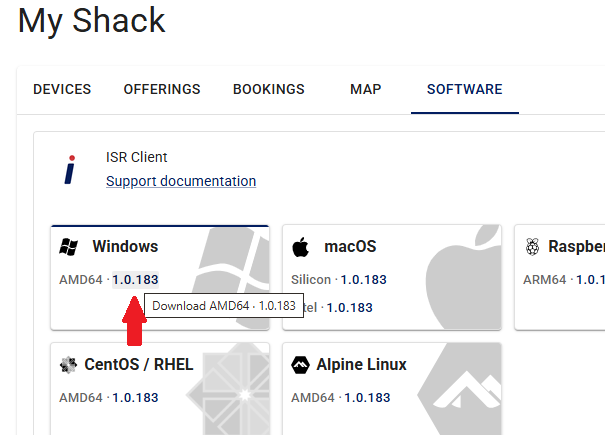
Sign in to the Hub and open the Software tab. Select the Windows AMD64 download.
-
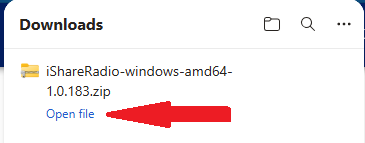
Open the zip file from your Downloads folder.
-
Inside the zip you will see the setup program and a
.sha256checksum file. Double-click the setup.exe.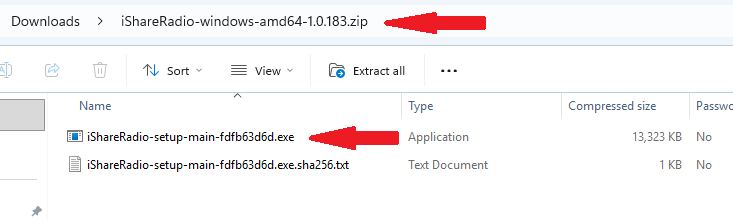
-
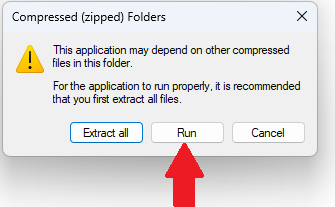
Windows may warn that the application should be extracted first. You can select Extract all, or select Run as shown here.
-
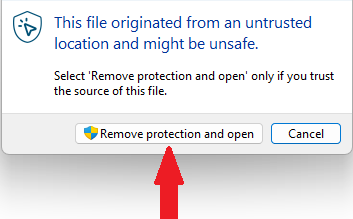
If Windows says the file came from an untrusted location, select Remove protection and open ONLY if you downloaded it from iShareRadio website. For safety, only use the installer that has been downloaded using the web site's link from the Settings --> Software page.
-
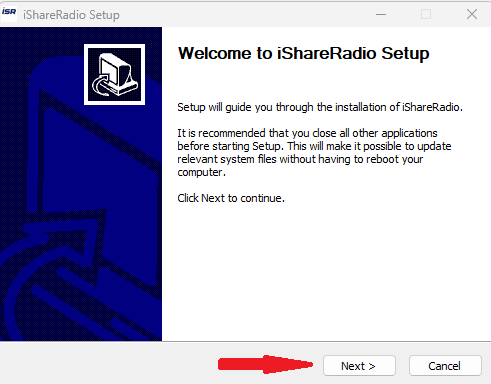
On the Welcome page, select Next.
-
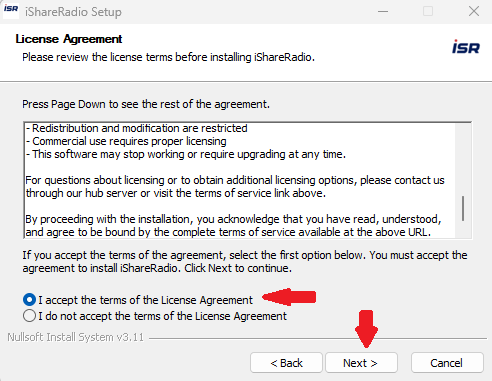
Accept the license agreement and select Next.
-
Confirm the install location. The default is
C:\Program Files (x86)\iShareRadio. Select Install.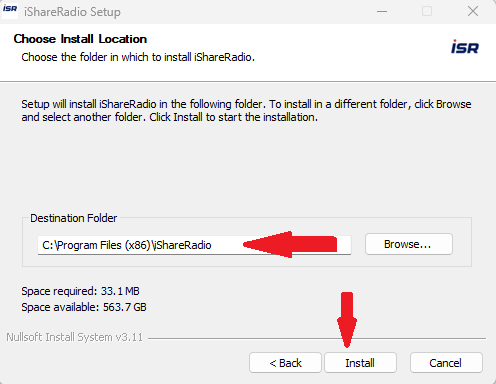
-
When setup finishes, an iShareRadio (ISR) icon is on your desktop. Double-click it to start the client.

-
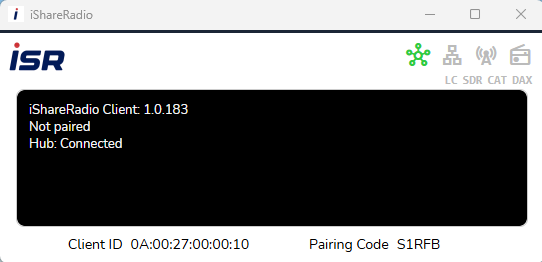
The client window should show Hub Connected. Not paired is normal until you pair the client with your account.
Next
Pair the client with your account. See Pairing the Client to Your Account.