MacOS Installer
Terms and Privacy
By installing the iSR Client on your computer, you understand and agree to the Terms of Service and Privacy Policy of the iShareRadio platform.
The iSR Client connects devices on your local network to the iShareRadio Hub. Once proxied and paired to an Operator on the Hub, those devices can be controlled, managed, and integrated with alerting and metrics.
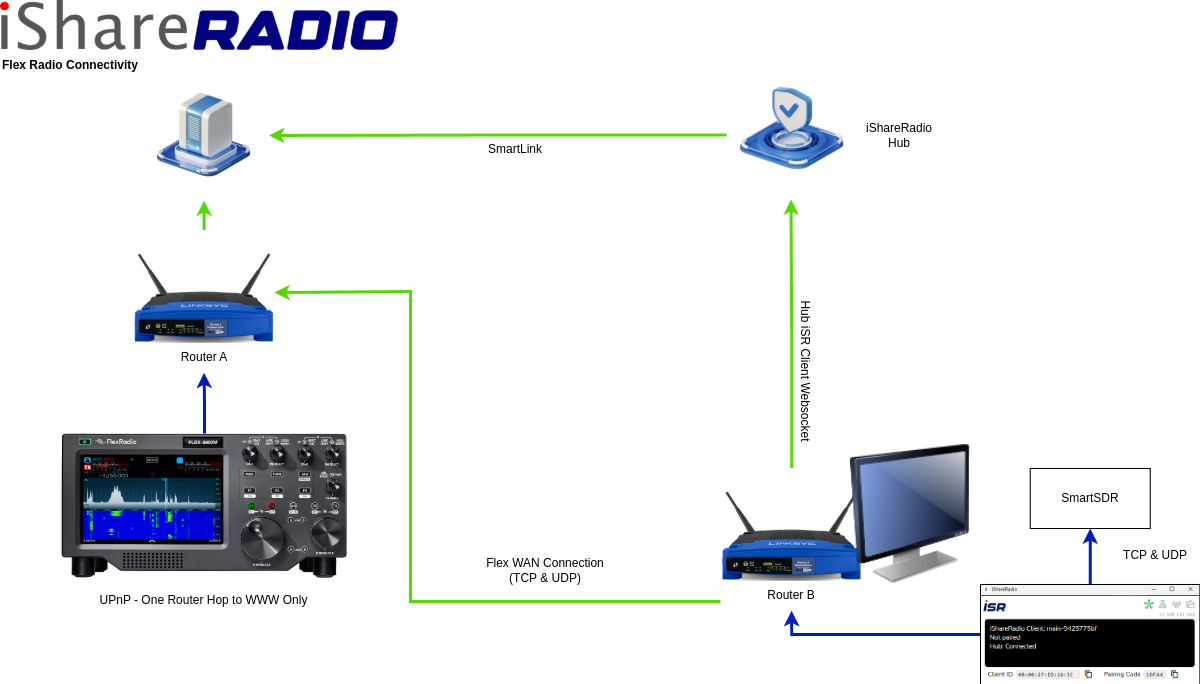
The iSR Client can run on the same Mac as your local radio software (for example SmartSDR), or on another computer on your network so long as it can reach those devices.
How the Proxy Works
The iSR Client is a secure, intelligent proxy for radios and shack automation on your LAN. It communicates with local devices, understands their configuration, controls switches, relays, and collects readings. The Hub does not directly connect to your local devices and waits for the iSR Client to send status and reading information. The Hub can also send instructions to control and set various features on connected modules.
The Operator must pair the iSR Client first, then pair (add device) each proxied device.
Before you start
This guide assumes you are new to Mac installation files. You need:
- A Mac running macOS 12 (Monterey) or later (Apple Silicon or Intel)
- Your iShareRadio account (sign in at hub2.ishareradio.com)
- A network connection to download the installer
Mac basics (quick orientation)
| Term | What it means |
|---|---|
| Finder | The Mac file manager — the blue-and-white face icon in the Dock (bar at the bottom of the screen). You use Finder to open folders and install apps. |
| Dock | The row of icons at the bottom (or side) of the screen. Applications and Downloads are common Dock shortcuts. |
| Applications folder | Where installed Mac apps live. Open it from the Dock or from Go → Applications in the Finder menu bar. |
| DMG | A disk image — a single download file (name ends in .dmg) that macOS treats like a temporary USB drive. You open it, copy the app out, then eject it. You do not run the DMG itself every time you use the app. |
| Launchpad | The grid of app icons (rocket in the Dock). Another way to start iShareRadio after install. |
Download the installer
- Sign in to the Hub at hub2.ishareradio.com.
- Open My Shack → Software.
- Under macOS, download the DMG for your Mac:
- Apple Silicon (M1, M2, M3, M4, …) — choose the arm64 build if both are listed.
- Intel Mac — choose the amd64 or Intel build.
The file is saved to your Downloads folder (for example iShareRadio-…-macos-arm64.dmg).
Install from the DMG
A DMG is not the app itself — it is a temporary container. Follow these steps once per download (for example when you first install or upgrade).
Step 1 — Open the DMG
Double-click the .dmg file in Downloads. macOS mounts it as a new disk on your desktop and opens a Finder window.
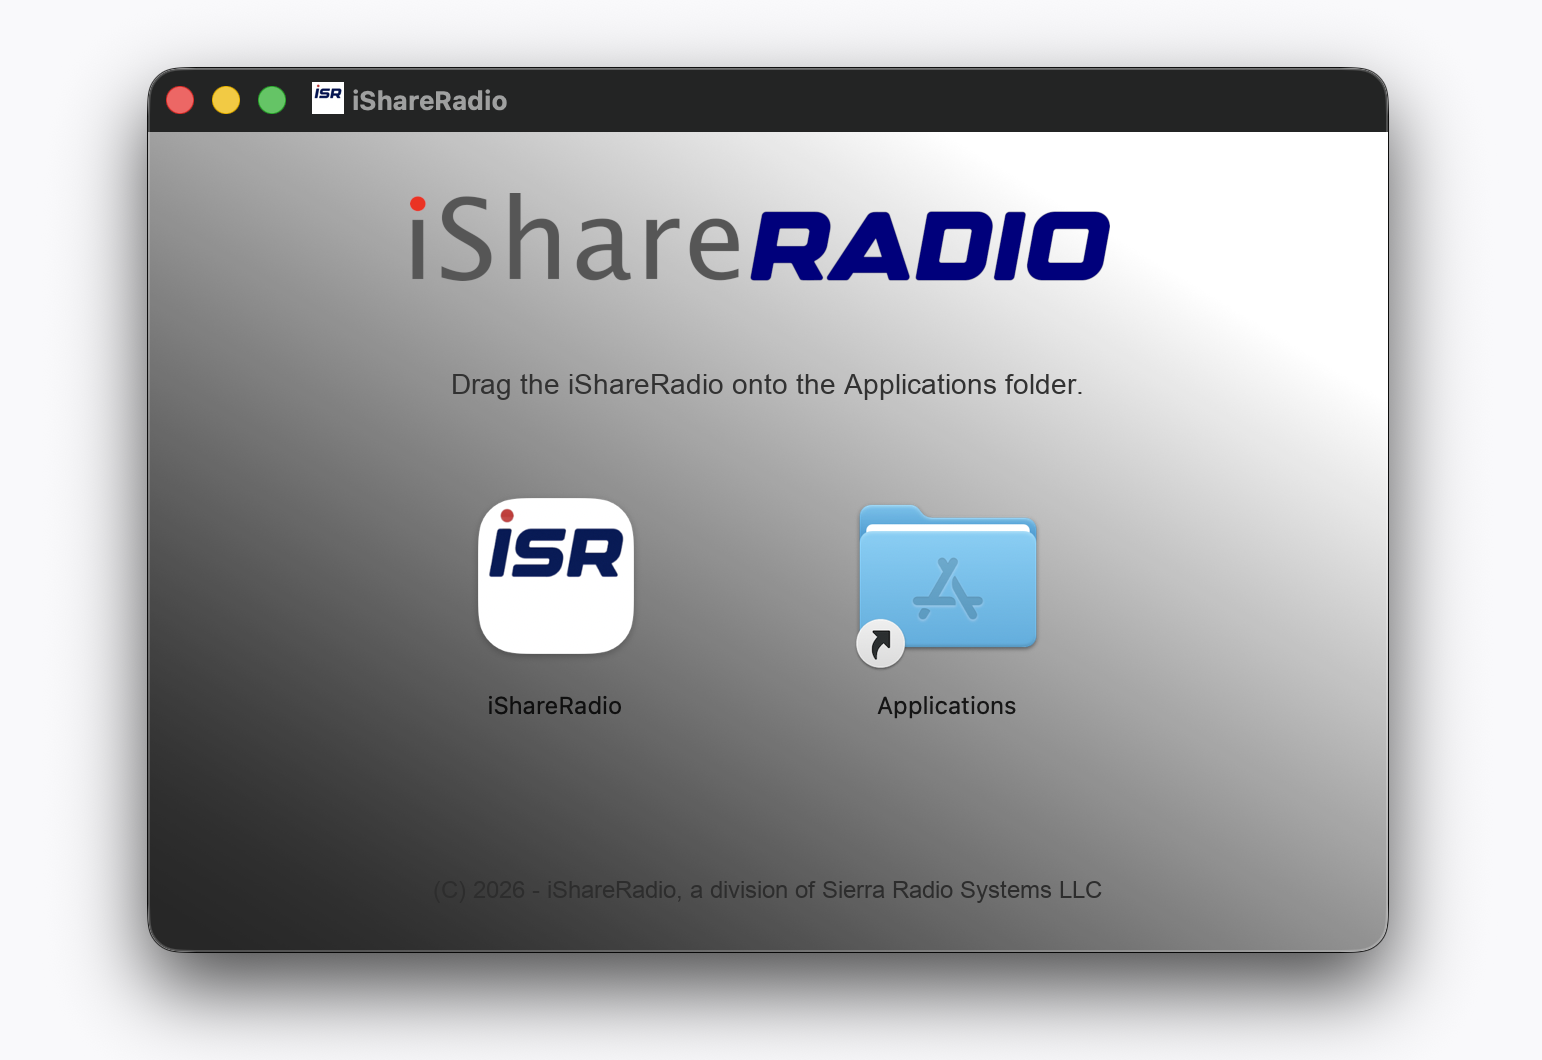
You should see:
- iShareRadio.app (the application)
- An Applications folder shortcut (or an arrow pointing to Applications)
If Finder does not open automatically, click the new disk icon on the desktop (often named iShareRadio).
Step 2 — Copy the app to Applications
Drag iShareRadio.app onto the Applications folder icon in that window. macOS copies the app into Applications.
Do not run the app from the DMG
Always install into Applications first. Running directly from the mounted disk image can cause update and permission problems later.
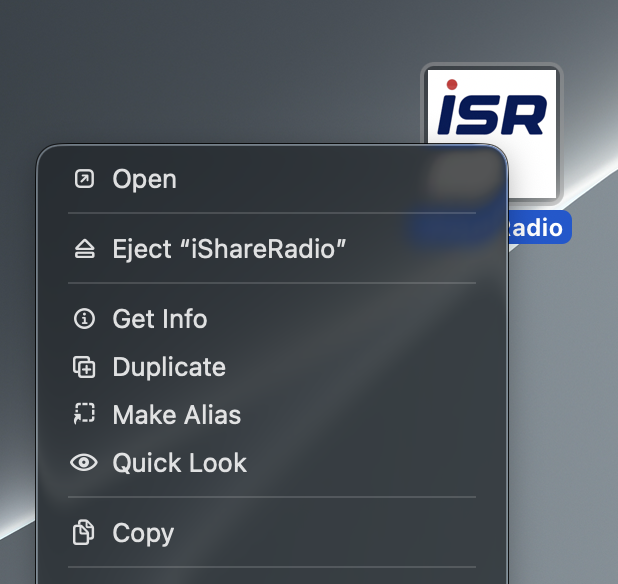
Step 3 — Eject the disk image
When the copy is done, eject the mounted DMG so your Mac is not still treating it as a removable disk:
- Drag the iShareRadio disk icon from the desktop to Trash, or
- In Finder’s sidebar under Locations, click the eject (⏏) button next to the disk name.
You can delete the .dmg file from Downloads afterward if you want to save space; keep it if you may reinstall on the same Mac later.
First launch
Open iShareRadio from Applications (Finder → Applications) or Launchpad (rocket icon in the Dock, then search for iShareRadio).
Verify the client is running
When the iSR Client is running, you can open its local status page in a web browser:
http://localhost:8111
The main iShareRadio window shows connection status LEDs and pairing information. See iSR Client GUI Layout for what the indicators mean.
Pair the client to your account
After the client is running on your Mac computer, you can then head to the iShareRadio website and pair it.
- Leave iShareRadio running on your Mac.
- In the Hub, go to Settings → Devices → Add Device.
- Choose iSR Client, select your device from the list (or enter the pairing code shown in the client), and confirm.
Detailed steps: Pairing the client.
Upgrading
When a new version is available, download the latest DMG from My Shack → Software and repeat the install steps above. You do not need to uninstall the old version first — dragging the new iShareRadio.app into Applications replaces the previous copy.
If the client window shows that an update is required, follow the in-app prompt or install from the Software tab.
Support
If you need help, use the clipboard copy button in the iSR Client window and post on the iShareRadio forum. See Reporting an issue and iSR Client Support.
Related guides
- VPN, CGNAT, and UDP discovery — if LAN or VPN affects discovery
- Windows installer — if you also use a PC on the same account
- Debian / Linux installer — for Linux desktops and servers